Understanding Dust Collection Systems
The fine particulate matter generated during woodworking, metalworking, and manufacturing processes isn’t just a nuisance—it’s a genuine health hazard. I’ve spent years in workshops where the air quality steadily deteriorated until installing proper dust collection became not just a preference but a necessity. This invisible enemy can cause respiratory issues, create fire hazards, and damage equipment over time.
Dust collection systems come in two primary varieties: stationary central systems and portable units. Central systems typically feature larger motors, extensive ductwork networks, and permanent installation. While effective, they require dedicated space and significant upfront investment. Portable systems, on the other hand, offer flexibility that’s invaluable in smaller workshops or for contractors who move between job sites.
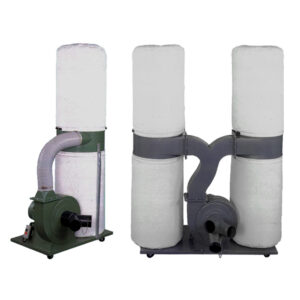
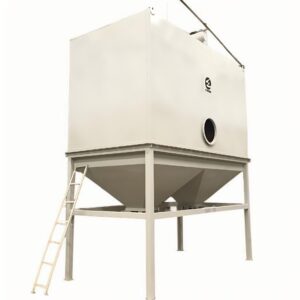
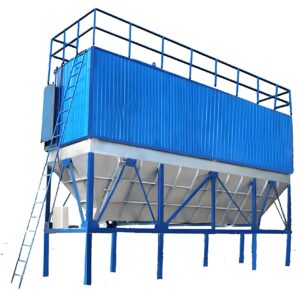
What exactly constitutes a portable dust collection system? Generally, these are self-contained units featuring a motor, impeller, collection bag or canister, and filtration system mounted on a wheeled base. Their design allows them to be moved where needed rather than requiring tools to be brought to fixed collection points. The PORVOO industrial portable dust collectors exemplify this mobility while maintaining industrial-grade collection capacity.
The advantages of portable systems extend beyond just mobility. They typically require less initial investment, can be upgraded incrementally, and allow for reconfiguration as workshop needs change. For small to medium workshops, a well-designed portable system often provides sufficient dust collection while preserving valuable floor space.
Dr. Michael Anderson, an industrial hygienist specializing in workplace air quality, notes: “While central systems provide superior overall collection in large operations, portable systems with proper filtration can maintain equally safe air quality levels in appropriate applications if properly sized and maintained.”
Preparing for Your Portable Dust Collection System
Before diving into setup, a thoughtful assessment of your specific needs will save considerable frustration later. The effectiveness of any dust collection system hinges on matching its capacity to your particular requirements.
First, evaluate your workspace critically. What machines will require dust collection? How frequently are they used simultaneously? Is your primary concern fine dust (health) or chip collection (housekeeping)? The answers will guide your system selection.
Calculating appropriate CFM (cubic feet per minute) requirements is perhaps the most critical preliminary step. Each woodworking machine requires specific airflow for effective dust capture:
| Machine Type | Recommended CFM | Port Size | Notes |
|---|---|---|---|
| Table Saw | 350-450 | 4″ | Higher for cabinet saws with enclosed bases |
| Planer | 500-800 | 4-5″ | Chip volume requires higher capacity |
| Jointer (6″) | 350-450 | 4″ | Increases with jointer width |
| Bandsaw | 300-400 | 4″ | Lower requirement but important for fine dust |
| Router Table | 200-300 | 2.5-4″ | Multiple ports ideal for above/below collection |
| Miter Saw | 300-400 | 2.5-4″ | Notoriously difficult to capture all dust |
Remember that these CFM values represent individual machine requirements. If you’ll run multiple machines simultaneously, your system needs to accommodate the combined airflow demands. As a practical rule, most small to medium workshops can function well with portable systems in the 650-1,200 CFM range.
When selecting your portable dust collection system, consider filtration quality as carefully as airflow capacity. Standard filter bags might capture larger chips but allow the most dangerous fine particles (under 10 microns) to escape. The high-efficiency industrial portable dust collector with advanced filtration can capture particles down to 1 micron or smaller, offering significantly improved air quality.
Safety considerations should never be an afterthought. Ensure your system includes proper grounding to prevent static buildup, which can potentially cause ignition in dusty environments. If collecting particularly combustible materials like aluminum or magnesium, specialized spark-resistant components may be necessary.
Step 1: Gathering Necessary Tools and Materials
Setting up a portable dust collection system requires more than just the collector itself. I learned this lesson the hard way when I realized mid-installation that I lacked crucial components and had to pause the project for a supply run.
Start by assembling these basic tools:
- Screwdrivers (Phillips and flathead)
- Adjustable wrenches
- Drill with appropriate bits
- Tape measure
- Utility knife
- Level
- Marker or pencil
- Hose clamps
- Teflon tape (for threaded connections)
- Duct tape (for temporary sealing/testing)
Beyond tools, you’ll need various components to complete the system. While specific requirements vary by setup, most portable systems require:
- The main dust collector unit
- Flexible hose (typically 4″ diameter for main runs)
- Rigid ductwork (optional but improves efficiency)
- Blast gates to control airflow to different machines
- Y-connectors and reducers for branching
- Machine-specific adapters (many tools have non-standard port sizes)
- Hose clamps and connectors
- Dust collection accessories for specific applications
When selecting components, compatibility between parts becomes crucial. Many workshops suffer from inefficient collection because of mismatched components creating air leaks or restrictions. The technicians at specialized portable dust extraction equipment providers can help ensure components work together seamlessly.
“I always recommend purchasing slightly more ducting and connectors than you initially calculate,” says Thomas Weber, a woodworking instructor with 25 years of experience. “System designs invariably evolve during setup, and having extra components prevents frustrating delays.”
Step 2: Planning the Layout and Configuration
The efficiency of your portable dust collection system depends significantly on thoughtful layout planning. Even the most powerful collector will underperform with poor configuration.
Start by mapping your workspace, noting the position of each dust-producing machine and the typical workflow between them. Ideally, position your portable collector centrally to minimize duct run lengths. I’ve found that placing the collector near the machines that generate the most dust or require the highest CFM often works best.
When planning ductwork, remember these key principles:
- Minimize run lengths – Each foot of ductwork reduces system efficiency
- Reduce bends – Each 90° bend can reduce airflow by up to 50% compared to straight runs
- Use gradual curves – When turns are necessary, use 45° fittings or wide-radius bends
- Size appropriately – Main ducts should match the collector inlet size; avoid reductions
- Plan for expansion – Consider future tool additions in your initial layout
For flexible hose placement, aim for the shortest possible runs to machines. While flexible hose is convenient, it creates significantly more resistance than smooth-walled rigid ducting. In my shop, I use rigid ducting for main runs and reserve flexible hose for the final connections to mobile tools.
An often-overlooked aspect of layout planning is maintenance accessibility. Ensure your design allows access to clean filters, empty collection containers, and troubleshoot potential clogs. The portable dust collector with efficient filtration system is designed with maintenance accessibility in mind, but your ducting layout should complement this feature.
If your workflow frequently changes, consider a modular approach where the portable collector can be quickly disconnected and reconnected to different collection points. This might sacrifice some efficiency but maximizes the portability advantage.
Step 3: Assembling the Main Dust Collector Unit
With planning complete, it’s time to assemble the main collection unit. While specific assembly varies by manufacturer, the process follows a general pattern that I’ve found consistent across many models.
Begin by unpacking all components and verifying them against the parts list. This simple step has saved me considerable frustration by identifying missing hardware before beginning assembly. Lay out parts systematically on a clean, flat surface with sufficient working space.
Most portable dust collectors arrive partially disassembled to reduce shipping size. Typical components include:
- Motor and impeller housing (often pre-assembled)
- Collection drum or bag
- Filtration system (cartridge filters or bags)
- Mobile base or wheel kit
- Hardware and fasteners
- Control panel or switch assembly
Follow the manufacturer’s assembly sequence precisely. I’ve learned through experience that deviating from recommended assembly order often leads to having to backtrack and disassemble. Pay particular attention to:
- Motor mounting – Ensure secure fastening and proper alignment
- Impeller housing orientation – Correct positioning affects airflow direction
- Filter sealing – Even small gaps can allow fine dust to bypass filtration
- Base assembly – Proper wheel positioning affects stability during operation
When assembling the specialized industrial portable dust extraction system, take care with gaskets and seals at connection points. These critical components prevent leakage but can be easily damaged during assembly if forced.
Once basic assembly is complete, perform an initial test before connecting ductwork. This identifies any motor issues or air leaks in the main unit before the system becomes more complex. Listen for unusual noises and check for vibration that might indicate impeller imbalance or loose components.
“Assembly quality directly affects collector performance,” explains Elena Martinez, a dust collection system specialist. “Ensuring proper seals at the collection and filtration stages prevents the most dangerous fine particles from escaping back into your workspace.”
Step 4: Setting Up Ductwork and Connections
With the main collection unit assembled, focus shifts to the ductwork system that delivers dust-laden air from tools to the collector. This component dramatically impacts overall system efficiency.
Ductwork options typically include:
| Duct Type | Advantages | Disadvantages | Best Used For |
|---|---|---|---|
| Spiral Metal | Smooth interior, excellent airflow, durable, fire-resistant | Higher cost, less flexible, requires more planning | Main runs, permanent installations |
| PVC Pipe | Smooth interior, corrosion-resistant, relatively inexpensive | Potential static buildup, can be brittle | Main runs where fire risk is minimal |
| Flexible Hose | Easily routed, good for moving machines | High resistance, can collapse under strong suction, wears out | Final connections to tools, temporary setups |
| Snap-Lock Metal | Moderate cost, commercially available | More resistance than spiral, potential leaks at seams | Secondary branches, moderate budget systems |
For most portable systems, I recommend a hybrid approach: rigid ducting for main runs from the collector and flexible hose for final machine connections. This balances efficiency with the flexibility that makes portable systems valuable.
When installing ductwork:
- Start from the collector and work outward toward machines
- Seal all connections with appropriate tape or sealant
- Support horizontal runs every 4-6 feet to prevent sagging
- Install blast gates at branch beginnings for isolation
- Maintain proper slope on horizontal runs to prevent material settling
One common mistake is underestimating the importance of properly sized ducting. While it might seem logical that smaller ducts create higher velocity, they actually create excessive resistance that reduces overall system performance. Match your main duct size to the collector inlet—typically 4″ or 5″ for portable units. Only reduce sizes at the very end for specific tool connections.
During my workshop renovation last year, I discovered that replacing my 3″ flexible main line with 4″ spiral metal duct nearly doubled the effective collection at my table saw despite using the same portable collector. The improved airflow from reduced resistance made a dramatic difference.
For systems with multiple collection points, consider the specialized portable dust collector with multi-point collection that’s designed specifically for these applications. Its optimized inlet configuration reduces the resistance issues common in aftermarket modifications.
Step 5: Installing Blast Gates and Collection Points
Blast gates serve as the traffic control system for your dust collection network, directing airflow where it’s needed while shutting off unused branches. Their proper installation significantly improves system efficiency.
Place blast gates at the beginning of each branch line, positioned for easy access during operation. I prefer mounting them within arm’s reach of each machine, allowing quick adjustment while working. The gates should be oriented vertically when possible to prevent dust accumulation in the gate mechanism.
When selecting blast gates, consider these options:
- Self-cleaning gates – Include a mechanism that clears dust from tracks during operation
- Sealed gates – Provide gaskets for better airflow isolation
- Blast gates with position indicators – Helpful in complex systems
- Automatic gates – Can be linked to machine operation for hands-free control
At each machine, create efficient collection points that capture dust at its source. This often requires customized solutions beyond basic port connections. For example:
- Table saws benefit from both below-blade collection and over-blade guards with dust ports
- Router tables need collection at the bit and in the cabinet
- Miter saws work best with slotted hoods that surround the cutting area
- Planers and jointers usually have built-in collection points but may need adapters
For machines with inadequate built-in dust collection, aftermarket solutions like adjustable hoods can dramatically improve capture efficiency. Position these as close to the dust source as possible without interfering with operation.
The connection between machines and ducting requires careful attention. Use appropriate reducers to transition from your main duct size to machine port sizes. Secure connections with proper clamps rather than just forcing hoses onto ports. Even small air leaks can significantly reduce collection effectiveness.
I’ve found that mobile machines benefit from quick-disconnect fittings that allow easy reconfiguration. These specialized connectors maintain a good seal while permitting fast changes—perfect for the flexibility that makes a portable dust collection system valuable.
Step 6: Electrical Connections and Controls
The electrical setup for your portable dust collection system affects both safety and convenience. While most portable units simply plug into standard outlets, optimizing the control system improves functionality.
First, verify your collector’s power requirements against your available electrical supply. Most residential portable collectors operate on standard 120V circuits, but larger units may require 240V service. I learned this lesson when my upgraded collector kept tripping breakers until I installed a dedicated circuit.
Check these electrical specifications:
- Required voltage (typically 120V or 240V)
- Amperage draw (determines circuit requirements)
- Starting amperage (significantly higher than running amperage)
- Recommended circuit breaker size
- Wire gauge requirements for longer runs
For basic setups, the collector’s built-in switch may be sufficient. However, several control enhancements can improve functionality:
- Remote switches – Allow activation from across the shop
- Automatic controllers – Sense when tools are operating and start collection
- Programmable timers – Run the collector for set periods after tool shutdown
- Smart controllers – App-controlled operation with scheduling capabilities
- Blast gate automation – Electronically open/close gates based on machine use
The industrial-grade portable dust collection system offers compatible control interfaces that simplify integration with automated systems when required for production environments.
Safety should be paramount in electrical planning. Ensure proper grounding throughout the system to prevent static buildup. In dust-heavy environments, use appropriate dust-tight electrical components and follow applicable electrical codes.
“Many shop fires start from inadequate dust collection electrical systems,” cautions fire safety inspector James Wilson. “Improper grounding or unsuitable components create ignition risks in dust-laden environments.”
For workshops with multiple users, consider lockout systems that prevent unauthorized operation or clear indicators showing when the system is active. These simple additions prevent confusion and potential hazards.
Step 7: Testing and Optimization
Once installation is complete, systematic testing and optimization are essential to achieve peak performance from your portable dust collection system. This final step often makes the difference between adequate and excellent dust control.
Begin testing with a visual inspection of all connections and components. Look for obvious leaks, loose fittings, or improperly seated filters. Then conduct these tests with the system running:
- Airflow testing – Use an anemometer or simple tissue paper test at each collection point
- Leak detection – Check for air escaping at joints using smoke pencils or talcum powder
- Performance verification – Test actual dust collection during typical operations
- Noise assessment – Identify any unusual sounds indicating restrictions or imbalance
- Pressure testing – Measure static pressure at key points if equipment is available
When I first set up my system, airflow at my table saw was disappointing despite having calculated sufficient CFM. Testing revealed several issues: a partially collapsed flexible hose hidden behind the saw, a blast gate that wasn’t opening fully, and a minor leak at the main collector housing. Addressing these seemingly minor issues doubled effective collection performance.
Common problems and solutions to watch for:
| Issue | Possible Causes | Solutions |
|---|---|---|
| Weak suction at machines | Leaks, restrictions, undersized ductwork, overtaxed system | Seal leaks, remove restrictions, upgrade ductwork, add dedicated drops |
| Excessive noise | Impeller imbalance, duct resonance, loose components | Balance impeller, secure components, add vibration isolation |
| Frequent filter clogging | Inadequate pre-separation, fine dust, insufficient cleaning | Add cyclone separator, implement regular cleaning schedule |
| Dust escaping from collector | Poor filter sealing, overfilled collection, improper assembly | Check seals, empty collection more frequently, verify assembly |
| System struggles with certain materials | Material properties, inadequate airflow, system limitations | Adjust material handling practices, evaluate system upgrade needs |
Optimization might include adding a cyclone pre-separator to reduce filter clogging, relocating the collector for shorter duct runs, or reconfiguring blast gates to improve airflow distribution. The goal is continual refinement based on actual performance.
Maintenance and Upkeep
A well-maintained portable dust collection system maintains peak performance and extends equipment life. Establishing a regular maintenance routine prevents the gradual degradation that often goes unnoticed until problematic.
Develop a maintenance schedule that includes:
Daily/Weekly Tasks:
- Empty collection containers before they’re 75% full
- Visually inspect hoses and connections for damage
- Check for unusual noises or vibrations during operation
- Ensure blast gates move freely and seal properly
Monthly Tasks:
- Clean or replace primary filters according to manufacturer recommendations
- Check motor brushes if applicable
- Inspect impeller housing for material buildup
- Verify all electrical connections remain secure
- Test overall system performance at various collection points
Quarterly/Annual Tasks:
- Deep clean filters or follow manufacturer’s replacement schedule
- Inspect and lubricate moving parts as needed
- Check motor bearings for wear
- Clean ductwork if material accumulation is evident
- Perform thorough system inspection and airflow testing
For filter maintenance, which directly affects both performance and air quality, follow the manufacturer’s specific recommendations. The specialized filtration systems in equipment like the PORVOO portable industrial dust collector may have specific cleaning procedures to maintain efficiency without damaging filter media.
I’ve found that using compressed air for filter cleaning works well for some systems but can damage others. For my cartridge filters, a gentle vacuum approach from the outside, followed by controlled air pulses from the inside, extends filter life while maintaining performance.
Pay special attention to collection capacity. Allowing collection containers to overfill creates unnecessary back pressure and can damage filters or the impeller. Consider implementing a visual fill level indicator if your system lacks one.
Finally, keep a maintenance log tracking filter changes, repairs, and system modifications. This record helps identify recurring issues and optimal maintenance intervals based on your specific usage patterns.
Proper maintenance not only ensures effective dust collection but also maximizes the substantial investment you’ve made in equipment and installation. As the workshop adage goes: “The most expensive dust collector is the one that doesn’t work properly.”
Frequently Asked Questions of portable dust collection system setup
Q: What is a portable dust collection system setup, and why is it important?
A: A portable dust collection system setup is crucial for maintaining a clean and safe workspace, especially in woodworking and other dusty environments. It helps capture dust and debris, reducing health risks and improving air quality. Portable systems are versatile and can be easily moved between different tools and locations.
Q: What are the essential components of a portable dust collection system setup?
A: Key components include a dust collector unit, piping and connectors, blast gates, and a filter upgrade. These elements work together to efficiently capture dust and ensure optimal airflow. A Thien baffle or chip separator can also be added to enhance performance.
Q: How do I choose the right dust collector for my portable dust collection system setup?
A: When selecting a dust collector, consider factors such as power (measured in horsepower), airflow capacity, and filter quality. A higher horsepower and better filter can improve dust collection efficiency. Popular options include the Harbor Freight 2 HP dust collector, which may require a filter upgrade for optimal performance.
Q: What are the benefits of using a Thien baffle in a portable dust collection system setup?
A: A Thien baffle helps separate chips and dust before they reach the impeller and filter, maximizing airflow and ensuring a clean filter. This improves the overall efficiency of the dust collection system and reduces maintenance needs.
Q: How do I ensure proper electrical setup for my portable dust collection system?
A: Ensure that your dust collector is connected to a suitable electrical circuit. A 20-amp breaker is often recommended, especially if you have other power tools in use. Verify that the receptacle is also rated for 20 amps to prevent overload.
Q: Can I customize my portable dust collection system setup for different tools?
A: Yes, you can customize your setup by using blast gates to direct airflow to specific tools. This allows you to efficiently manage dust collection across various machines in your workshop. Metal blast gates are recommended over plastic ones for better performance.
External Resources
- Portable Dust Collection System Setup Guide – This guide provides step-by-step instructions on setting up a portable dust collection system, focusing on flexibility and efficiency in various work environments.
- Setting Up Portable Dust Collection – Offers practical tips and tools for creating a portable dust collection system, ideal for small workshops or mobile woodworking operations.
- Portable Dust Collection Solutions – Discusses innovative solutions for portable dust collection, including modular designs and adaptable components for different tools and spaces.
- Woodworking Dust Collection Essentials – While not exclusively focused on portable systems, this resource provides essential insights into dust collection principles that can be applied to portable setups.
- DIY Portable Dust Collection – A DIY guide to building a portable dust collection system using affordable materials and tools, suitable for hobbyists and small-scale woodworkers.
- Mobile Dust Collection Systems – Explores the benefits and challenges of mobile dust collection systems, including design considerations and equipment recommendations for effective dust management in dynamic environments.
