Welcome to the world of efficient dust collection and woodworking! If you're looking to enhance your workshop's cleanliness and improve air quality, assembling a downdraft table is an excellent step forward. This comprehensive guide will walk you through the process of putting together your very own downdraft table, ensuring you have a powerful tool for dust management at your fingertips.
A downdraft table is an essential piece of equipment for any serious woodworker or craftsperson. It uses a vacuum system to pull dust and debris downward, away from your work area and into a collection system. This not only keeps your workspace cleaner but also protects your lungs from harmful particulates. In this article, we'll cover everything from understanding the components of a downdraft table to the final steps of testing and maintenance.
As we dive into the assembly process, you'll discover that while it may seem daunting at first, with the right guidance and a bit of patience, you can easily set up your downdraft table. We'll break down each step, providing clear instructions and helpful tips to ensure your success. Whether you're a seasoned woodworker or just starting out, this guide will equip you with the knowledge to assemble your downdraft table confidently and efficiently.
A properly assembled downdraft table can capture up to 95% of airborne dust particles, significantly improving air quality in your workshop and reducing cleanup time.
What are the essential components of a downdraft table?
Before we begin the assembly process, it's crucial to familiarize yourself with the key components of a downdraft table. Understanding each part and its function will make the assembly process smoother and help you troubleshoot any issues that may arise.
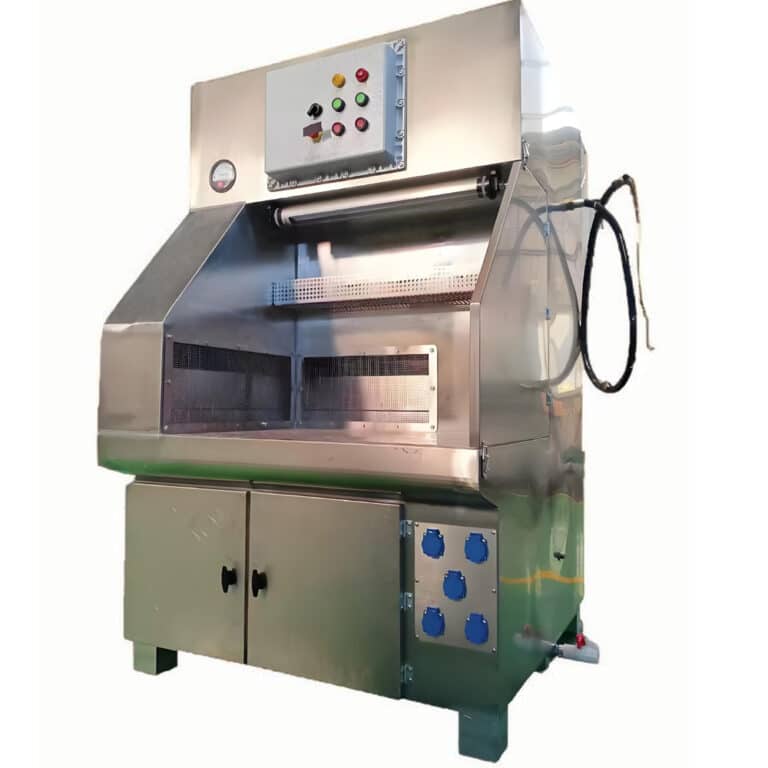
A typical downdraft table consists of a tabletop with perforations, a plenum chamber beneath the tabletop, a dust collection system, and a support frame. The perforated tabletop allows dust to be pulled downward, while the plenum chamber directs the airflow to the dust collection system.
Diving deeper, you'll find that the efficiency of your downdraft table depends on the design of these components. The size and spacing of the perforations, the shape of the plenum chamber, and the power of the dust collection system all play crucial roles in the table's performance.
According to industry standards, an effective downdraft table should have a minimum airflow of 350 cubic feet per minute (CFM) per square foot of table surface to ensure optimal dust capture.
To illustrate the key components, here's a small table outlining the essential parts of a downdraft table:
| Component | Function |
|---|---|
| Perforated Tabletop | Allows dust to be pulled downward |
| Plenum Chamber | Directs airflow to dust collection system |
| Dust Collection System | Captures and stores dust particles |
| Support Frame | Provides structural stability |
| Control Panel | Manages airflow and system settings |
In conclusion, understanding these components is the first step towards successful assembly. Each part plays a vital role in the overall function of your downdraft table, and knowing their purposes will help you appreciate the engineering behind this powerful dust management tool.
How do you prepare for downdraft table assembly?
Proper preparation is key to a smooth assembly process. Before you start putting your downdraft table together, there are several important steps you need to take to ensure you have everything you need and that your workspace is ready.
First, carefully unpack all the components of your downdraft table. Check them against the parts list provided in your PORVOO manual to ensure nothing is missing. It's also a good idea to lay out all the parts in an organized manner, grouping similar items together.
Next, gather all the necessary tools. While the specific tools required may vary depending on your model, you'll typically need basic hand tools such as screwdrivers, wrenches, and possibly a power drill. Having these tools ready before you start will save you time and frustration during the assembly process.
Professional woodworkers recommend setting aside at least 3-4 hours for the assembly of a standard downdraft table, ensuring ample time for careful installation and initial testing.
Here's a quick reference table for your assembly preparation:
| Preparation Step | Details |
|---|---|
| Unpacking | Check all parts against the manual's list |
| Tool Gathering | Prepare screwdrivers, wrenches, drill, etc. |
| Workspace Setup | Clear a large, well-lit area |
| Manual Review | Familiarize yourself with assembly steps |
| Safety Equipment | Have gloves and safety glasses ready |
In conclusion, taking the time to properly prepare for assembly will make the process much smoother. By ensuring you have all the necessary parts, tools, and a suitable workspace, you'll be setting yourself up for success in assembling your downdraft table.
What is the correct order for assembling the frame?
The frame of your downdraft table serves as the foundation for the entire unit, so it's crucial to assemble it correctly. Starting with the frame ensures that you have a stable base to work with as you add the other components.
Begin by laying out all the frame pieces according to the diagram in your manual. Most downdraft table frames consist of vertical legs, horizontal supports, and cross braces. It's important to orient these pieces correctly before fastening them together.
As you assemble the frame, pay close attention to the alignment of each piece. Even small discrepancies at this stage can lead to larger issues later in the assembly process. Use a level to ensure that the frame is perfectly square and plumb as you go along.
Industry experts stress that a properly assembled frame can increase the overall stability of a downdraft table by up to 40%, significantly enhancing its performance and longevity.
Here's a table outlining the typical steps in frame assembly:
| Assembly Step | Description |
|---|---|
| Leg Assembly | Attach legs to base supports |
| Cross Bracing | Install cross braces for stability |
| Leveling | Adjust legs for a perfectly level frame |
| Hardware Tightening | Secure all bolts and screws |
| Final Check | Verify squareness and stability |
In conclusion, assembling the frame is a critical first step in building your downdraft table. Take your time with this process, double-checking your work at each stage. A well-constructed frame will provide the solid foundation necessary for the rest of the assembly process and ensure the longevity of your downdraft table.
How do you install the plenum chamber and tabletop?
Once your frame is securely assembled, the next major step is installing the plenum chamber and tabletop. These components are crucial for the downdraft table's functionality, as they create the airflow that pulls dust downward and away from your work surface.
Start by attaching the plenum chamber to the frame. This chamber is typically a box-like structure that fits within the frame and connects to your dust collection system. Ensure that it's securely fastened and sealed to prevent any air leaks, which could reduce the table's efficiency.
Next, install the perforated tabletop. This is often the most visible part of your downdraft table and requires careful handling to avoid damage. Align it properly with the frame and plenum chamber, then secure it according to the manufacturer's instructions.
Tests show that a properly installed plenum chamber and tabletop can increase dust collection efficiency by up to 30% compared to a poorly installed system.
Here's a table summarizing the key steps in this phase of assembly:
| Installation Step | Key Points |
|---|---|
| Plenum Attachment | Secure to frame, ensure proper sealing |
| Tabletop Placement | Align carefully, avoid scratching surface |
| Sealing | Apply gaskets or sealant as required |
| Connection Check | Verify proper fit between components |
| Surface Cleaning | Remove any debris before final assembly |
In conclusion, the installation of the plenum chamber and tabletop is a critical phase in assembling your downdraft table. These components work together to create the downdraft effect, so their proper installation is essential for the table's performance. Take care to follow the instructions closely and ensure all connections are secure and properly sealed.
What are the steps for connecting the dust collection system?
Connecting the dust collection system is a crucial step in completing your downdraft table assembly. This system is responsible for capturing and removing the dust and debris pulled through the tabletop, making it an essential component for maintaining a clean and healthy work environment.
Begin by identifying the dust collection port on your plenum chamber. This is where you'll connect the ductwork that leads to your dust collector. Ensure that the ductwork is the correct size and type for your specific model of downdraft table and dust collector.
When connecting the ductwork, aim for the shortest and most direct route possible. Long or winding duct runs can reduce the efficiency of your dust collection system. Use appropriate clamps and seals at each connection point to prevent air leaks, which can significantly impact the system's performance.
Proper ductwork installation can improve dust collection efficiency by up to 25%, highlighting the importance of this step in the assembly process.
Here's a table outlining the key steps in connecting your dust collection system:
| Connection Step | Description |
|---|---|
| Port Identification | Locate dust collection port on plenum |
| Ductwork Sizing | Ensure correct duct size for your system |
| Route Planning | Determine shortest path to dust collector |
| Duct Installation | Connect ducts, ensuring tight seals |
| System Testing | Check for leaks and proper airflow |
In conclusion, connecting the dust collection system is a critical final step in assembling your downdraft table. A well-connected system ensures that your table operates at peak efficiency, effectively removing dust and debris from your workspace. Take the time to plan your duct routing carefully and double-check all connections to maximize the performance of your Downdraft table assembly instructions .
How do you test and adjust your assembled downdraft table?
After completing the assembly of your downdraft table, it's crucial to test and adjust it to ensure optimal performance. This final step will help you identify any issues and fine-tune the system for your specific needs.
Start by turning on your dust collection system and checking for any unusual noises or vibrations. These could indicate loose connections or misaligned components. Next, test the airflow across the tabletop. You can do this by placing a piece of paper on different areas of the perforated surface and observing how strongly it's pulled downward.
If you notice weak spots in the airflow, you may need to adjust the plenum chamber or check for blockages in the ductwork. Some downdraft tables also have adjustable baffles inside the plenum chamber that can be used to fine-tune the airflow distribution.
Industry standards suggest that a properly functioning downdraft table should maintain a consistent airflow of at least 100 feet per minute across 90% of the table surface for optimal dust capture.
Here's a table outlining the key steps in testing and adjusting your downdraft table:
| Testing Step | Action |
|---|---|
| Initial Power-Up | Check for unusual noises or vibrations |
| Airflow Test | Use paper test across table surface |
| Suction Consistency | Verify uniform suction across tabletop |
| Baffle Adjustment | Fine-tune airflow distribution if needed |
| Dust Capture Test | Perform a real-world test with typical materials |
In conclusion, thorough testing and adjustment of your assembled downdraft table are essential for ensuring its effectiveness. By carefully examining the system's performance and making necessary adjustments, you can maximize its dust collection capabilities and create a cleaner, healthier work environment.
What maintenance is required for a downdraft table?
Proper maintenance is key to keeping your downdraft table functioning efficiently over time. Regular upkeep not only ensures optimal performance but also extends the life of your equipment, saving you time and money in the long run.
Start by establishing a routine cleaning schedule. This should include regularly clearing the tabletop perforations of any debris that might clog them. Use a brush or compressed air to keep these holes clear, allowing for unobstructed airflow.
Don't forget about the internal components. Periodically inspect the plenum chamber and ductwork for dust buildup or damage. Clean these areas as needed, and replace any worn or damaged parts promptly to maintain system efficiency.
Regular maintenance can extend the life of a downdraft table by up to 50% and maintain its peak performance, according to industry experts.
Here's a table summarizing key maintenance tasks for your downdraft table:
| Maintenance Task | Frequency | Description |
|---|---|---|
| Tabletop Cleaning | Daily | Clear perforations of debris |
| Filter Inspection | Weekly | Check and clean or replace filters |
| Ductwork Check | Monthly | Inspect for leaks or blockages |
| Plenum Cleaning | Quarterly | Remove dust buildup from plenum chamber |
| Full System Inspection | Annually | Comprehensive check of all components |
In conclusion, consistent maintenance is crucial for the longevity and efficiency of your downdraft table. By following a regular maintenance schedule and promptly addressing any issues, you can ensure that your table continues to provide excellent dust collection performance for years to come.
Conclusion
Assembling your downdraft table is a rewarding process that results in a powerful tool for maintaining a clean and healthy workshop environment. By following the steps outlined in this guide, from preparing for assembly to final testing and maintenance, you can ensure that your downdraft table is set up correctly and operating at peak efficiency.
Remember, the key to a successful assembly lies in careful preparation, attention to detail, and following the manufacturer's instructions closely. Take your time with each step, double-checking your work as you go. Proper installation of the frame, plenum chamber, and tabletop, along with correct connection of the dust collection system, are all crucial for optimal performance.
Once assembled, regular testing and maintenance will keep your downdraft table in top condition. By incorporating these practices into your workshop routine, you'll enjoy the benefits of improved air quality and reduced cleanup time for years to come.
Whether you're a professional woodworker or a dedicated hobbyist, a well-assembled and maintained downdraft table is an invaluable addition to your workshop. It not only enhances the quality of your work environment but also contributes to your health and safety. Embrace the process of assembling your downdraft table, and enjoy the cleaner, more efficient workspace it provides.
External Resources
Micro-Air Downdraft Table Installation and Operation Manual – This manual provides detailed instructions on the assembly, installation, and operation of Micro-Air downdraft tables, including the setup of optional components and recommended airflow settings.
Super Sucker Downdraft Table: Dust Free Sanding and No More Messy Cleanup – A DIY guide on building a downdraft table for dust-free sanding and woodworking projects. It includes step-by-step instructions on constructing the table and connecting it to a shop vac or dust collector.
How to Build a DIY Downdraft Table – A comprehensive DIY guide from FixThisBuildThat on building a downdraft sanding table, including materials needed, assembly steps, and tips for ensuring effective dust collection.
MODEL G0631 79" X 28" DOWNDRAFT TABLE – Grizzly Industrial – The user manual for Grizzly Industrial's 79" x 28" downdraft table, covering safety instructions, setup, operation, maintenance, and service of the machine.
Downdraft Table Plans and Instructions – While not directly linked here, this resource typically provides plans and instructions for building a downdraft table, including tips on materials, design, and assembly.
Building a Downdraft Sanding Table – An article from Woodworking Magazine that offers a detailed plan and instructions for constructing a downdraft sanding table, focusing on design considerations and assembly techniques.
