Understanding the Fundamentals of Cartridge Dust Collectors
I was recently called to consult on an aging manufacturing facility where workers complained of persistent respiratory issues. Walking through the plant, the air was visibly hazy—a telltale sign of inadequate dust collection. This scenario plays out in countless industrial settings where proper dust collection isn’t just about equipment longevity; it’s about worker health and regulatory compliance.
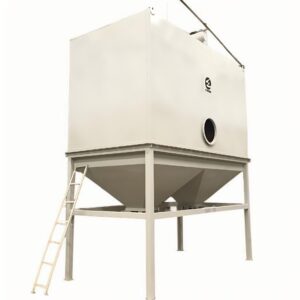
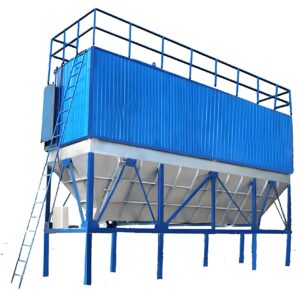
Cartridge dust collectors represent a significant advancement in industrial air cleaning technology. Unlike traditional baghouse systems, these collectors use pleated filter media that provides substantially more surface area in a compact footprint. The basic operating principle involves contaminated air entering the collector, passing through filter cartridges where particulates are captured, and clean air exiting through the outlet.
What makes these systems particularly effective is their pulse jet cleaning mechanism. As dust accumulates on the filters, compressed air pulses periodically dislodge the particulates, which fall into a collection hopper below. This self-cleaning feature extends filter life and maintains consistent airflow—crucial for continuous operations.
PORVOO systems incorporate innovative filter media technologies that address specific contaminant challenges across various industries. The technical specifications I’ve encountered show filtration efficiencies exceeding 99.9% for particles as small as 0.5 microns, an impressive benchmark by any standard.
Before diving into installation steps, it’s worth noting that cartridge dust collectors offer several advantages over other filtration technologies:
| Attribute | Cartridge Collectors | Baghouse Systems | Cyclone Separators |
|---|---|---|---|
| Filtration Efficiency | Very High (>99.9%) | High (98-99%) | Moderate (90-95%) |
| Space Requirements | Compact | Large footprint | Moderate to large |
| Maintenance Frequency | Moderate | High | Low |
| Initial Cost | Moderate to high | Moderate | Lower |
| Operating Pressure Drop | 4-6″ WG typical | 5-8″ WG typical | 2-4″ WG typical |
| Best Applications | Fine dust, metallic fumes | Various dusts | Coarse particles |
These systems aren’t without limitations, however. The initial capital investment can be substantial, and improper installation can severely compromise performance. This is precisely why following a structured installation approach is critical.
Pre-Installation Planning and Site Preparation
The success of any cartridge dust collector installation begins long before the first component is secured. I’ve witnessed perfectly good equipment fail to perform simply because pre-installation planning was rushed or overlooked.
Start with a comprehensive dust hazard analysis. This means collecting samples of your specific dust to understand its properties: particle size distribution, combustibility, abrasiveness, and moisture content. These characteristics directly influence the selection of an appropriate cartridge dust collector system with the right filter media and safety features.
Next, evaluate your facility’s layout and airflow patterns. I recall a woodworking facility where we repositioned several dust-generating machines to optimize capture hood placement, reducing the required system size by nearly 20%. This saved them considerable installation and operating costs while improving collection efficiency.
Site assessment should include:
- Structural evaluation for supporting equipment weight
- Available space for the collector and associated ductwork
- Proximity to electrical services and compressed air
- Access requirements for maintenance
- Environmental factors (temperature, humidity, etc.)
- Regulatory requirements and permits
The regulatory landscape deserves special attention. Depending on your location and industry, you’ll need to navigate permits related to air quality, building modifications, electrical work, and potentially fire safety. I’ve seen installations delayed by months because permit requirements weren’t identified early in the process.
Create a detailed pre-installation checklist that addresses these key requirements:
Step 1: System Design and Layout Configuration
System design is where theory meets practice, and it’s a step where I’ve seen many installations go astray. The foundation of good design is accurate airflow calculation—determining the exact CFM (cubic feet per minute) required at each collection point.
For a recent metalworking facility, we conducted a detailed analysis of each dust-generating process. The grinding stations required 1,200 CFM each, while the laser cutting tables needed 2,500 CFM. Understanding these specific requirements prevented the common mistake of undersizing the system.
The layout configuration must consider:
- Optimal placement of the main collector unit
- Strategic routing of ductwork to minimize bends and horizontal runs
- Proper sizing of ducts to maintain transport velocity
- Location of blast gates and dampers for system balancing
- Access points for maintenance and inspection
When designing the system, pay special attention to air-to-cloth ratio—the amount of air passing through each square foot of filter media. Industry standards typically recommend 2:1 to 4:1 for most applications, though this varies with dust type and characteristics. Going beyond these ranges to save on initial costs almost always results in shortened filter life and increased operational expenses.
A critical design consideration that’s often overlooked is the explosion protection strategy. If your dust is combustible (and many are), you’ll need to incorporate features like explosion vents, isolation valves, or possibly chemical suppression systems. These elements must be integrated during the design phase, not added as afterthoughts.
Step 2: Foundation and Support Structure Installation
The foundation supporting your cartridge dust collector deserves careful attention—it’s literally what your entire system rests upon. During a recent installation at a cement manufacturing plant, we had to completely redesign the foundation when soil testing revealed unstable conditions that would have eventually caused equipment misalignment.
Foundation requirements vary significantly based on:
| Collector Size | Foundation Type | Minimum Thickness | Special Requirements |
|---|---|---|---|
| Small (<5,000 CFM) | Reinforced concrete pad | 4-6 inches | Level within 1/8″ per foot |
| Medium (5,000-20,000 CFM) | Reinforced concrete pad | 6-8 inches | Anchor bolts set in concrete |
| Large (>20,000 CFM) | Engineered foundation | 8-12+ inches | Structural engineering review, vibration isolation |
| Roof-mounted | Structural support | Varies | Engineering certification required |
For indoor installations, evaluate floor loading capacity. Many industrial floors are designed for distributed loads, not the concentrated loads of dust collection equipment. I’ve worked with structural engineers who determined existing floors needed reinforcement before installation could proceed.
Support structures should be designed with a safety factor appropriate for your seismic zone. In regions with high seismic activity, additional bracing and flexible connections become essential. Wind loads must also be considered for outdoor installations—I’ve seen poorly anchored collectors damaged during strong storms.
When installing the support structure:
- Ensure perfect leveling—even slight misalignments can cause premature wear
- Use vibration isolation pads or springs where appropriate
- Install anchor bolts according to manufacturer specifications
- Follow proper torque sequences when securing equipment
- Provide adequate clearance for maintenance access
Remember that foundation curing takes time. Rushing this step by mounting equipment before concrete has fully cured can lead to foundation cracks and equipment settling.
Step 3: Main Housing Assembly and Mounting
The main housing assembly is where the primary components of your cartridge dust collector come together. This stage requires precision, patience, and strict adherence to the manufacturer’s instructions.
When I supervised an installation at a pharmaceutical facility, we created a controlled assembly area with proper lighting, clean surfaces, and all necessary tools organized in advance. This preparation paid dividends in assembly quality and efficiency.
Begin by unpacking and inspecting all components. Check for shipping damage and verify that you have all necessary parts, gaskets, fasteners, and accessories. Document any discrepancies immediately.
For the housing assembly:
- Start with the base section, ensuring it’s properly aligned with the foundation
- Add the middle (filter) section, checking gasket placement between sections
- Install the clean air plenum section, maintaining proper seal integrity
- Mount the hopper and dust discharge system
- Install access doors, ensuring proper sealing
A common issue I’ve encountered is improper gasket compression during assembly. Too little compression leads to air leakage, while excessive compression can damage gaskets. Follow the torque specifications provided by the manufacturer and use a torque wrench for consistency.
For larger systems, a crane or heavy lifting equipment will be necessary. Plan the lift carefully, using appropriate rigging techniques and ensuring all personnel understand the lifting plan. I’ve seen installations delayed by days when improper lifting damaged components.
Weather considerations matter during outdoor installations. I once had to pause an installation due to high winds that made lifting operations unsafe. Similarly, precipitation can compromise gasket integrity if water enters the assembly. When possible, schedule installation during favorable weather conditions.
Step 4: Cartridge Filter Installation
The heart of any cartridge dust collector installation lies in properly installing the filter cartridges. This critical step directly impacts filtration efficiency, system pressure drop, and operating costs.
I remember consulting on a troubleshooting project where a facility was experiencing poor performance and short filter life. The investigation revealed that the maintenance team had installed non-OEM filters that lacked the proper pleat spacing and media characteristics. The lesson was clear: using the right filters for your specific application is non-negotiable.
Before installing filters:
- Thoroughly clean the filter chamber to remove any construction debris
- Inspect the venturi tubes for proper alignment and secure mounting
- Check that the pulse cleaning system components are properly installed
- Verify that all sealing surfaces are clean and undamaged
When handling the filter cartridges:
- Keep them in their protective packaging until installation
- Handle them by the end caps, not the filter media
- Inspect each cartridge for shipping damage before installation
- Verify the filter media is appropriate for your specific dust
The actual installation sequence typically follows this pattern:
- Position the cartridge with the gasket facing the proper sealing surface
- Insert the cartridge into its cell
- Secure it with the manufacturer’s recommended fastening system
- Verify the gasket is properly compressed and sealed
- Document the installation date on each cartridge for maintenance records
A critical step that’s often overlooked is verifying proper cartridge seating. I’ve developed the habit of checking the compression of each gasket after installation—inconsistent compression often indicates misalignment that will lead to leakage.
Different collector designs use various cartridge mounting systems. Some use threaded rods with nuts, others employ quick-release mechanisms, and some require special tools. Follow the specific instructions for your system model.
Step 5: Ductwork and Piping Connection
The ductwork system is the circulatory system of your dust collection setup—poorly designed ductwork can undermine even the best collector. During a recent installation at a woodworking facility, we discovered that modifying the ductwork design to eliminate several unnecessary 90-degree bends reduced system pressure drop by over 20%.
Start with a detailed ductwork layout plan that minimizes total length and avoids unnecessary direction changes. When designing the system:
- Size main ducts and branches for proper transport velocity
- Position blast gates for system balancing
- Include clean-out access points at strategic locations
- Plan for expansion with future connections where appropriate
- Consider fabrication and installation sequence
For material transport velocity, different dusts require different minimum speeds to stay in suspension:
| Material Type | Recommended Duct Velocity |
|---|---|
| Fine, light dust | 3,500 – 4,000 FPM |
| Average industrial dust | 4,000 – 4,500 FPM |
| Heavy or coarse particles | 4,500 – 5,000 FPM |
| Moist or sticky materials | 5,000+ FPM |
During ductwork installation:
- Support ductwork independently from the collector
- Use flexible connections to isolate vibration
- Seal all joints properly to prevent leakage
- Ensure smooth internal transitions at branches and reductions
- Install proper grounding to dissipate static electricity
Compressed air piping for the pulse cleaning system deserves special attention. Use appropriately sized pipe (typically 3/4″ or larger) to ensure adequate volume and pressure. Install a moisture separator, regulator, and gauge just before the connection to the collector.
I’ve seen installations where undersized compressed air lines created pressure drops during pulsing cycles, dramatically reducing cleaning effectiveness. The compressed air supply must maintain consistent pressure and volume throughout the cleaning cycle.
Step 6: Electrical and Control System Setup
The electrical and control systems are what bring your cartridge dust collector to life, transforming it from static equipment into an intelligent, responsive system. This stage requires careful coordination between mechanical installers and electricians.
Based on my experience with numerous installations, I strongly recommend having a licensed electrician who understands industrial control systems handle this portion of the work. Improper electrical installation can not only damage equipment but create serious safety hazards.
Start with motor installation and wiring:
- Verify motor specifications match your power supply
- Ensure proper motor mounting and alignment
- Install appropriately sized thermal overload protection
- Verify rotation direction after connection
- Measure and record baseline amperage readings
The control panel installation requires:
- Mounting in an accessible, clean location
- Protection from environmental factors if installed outdoors
- Proper grounding and surge protection
- Clear labeling of all controls and indicators
- Appropriate conduit and wire routing
Modern cartridge collectors typically include sophisticated control systems. During a recent pharmaceutical installation, we integrated the dust collector controls with the facility’s building management system, allowing for remote monitoring and automated operation scheduling.
For timer-controlled pulse cleaning systems:
- Set appropriate pulse duration (typically 100-150 milliseconds)
- Configure pulse intervals based on application requirements
- Program differential pressure overrides if equipped
- Test each solenoid valve individually
- Verify compressed air pressure is within specifications
Don’t overlook safety interlocks and emergency controls. These should include:
- Emergency stop capability
- Differential pressure monitoring with alarms
- Rotation sensors on rotary airlocks if installed
- Integration with fire detection systems where required
- Motor overload protection
Document all control settings, wiring diagrams, and baseline operating parameters. This information is invaluable for maintenance personnel and future troubleshooting.
Step 7: System Testing and Commissioning
The final step in the installation process is thorough testing and commissioning—a step I’ve seen rushed far too often. At a textile manufacturing facility last year, we spent an extra day on meticulous commissioning and identified several minor issues that, left unaddressed, would have caused major operational problems within weeks.
Start with pre-startup checks:
- Verify all mechanical connections are tight
- Confirm all access doors and panels are properly secured
- Check that all safety guards are in place
- Ensure all electrical connections are secure
- Verify compressed air system is operational
- Check that the dust disposal system is ready
Initial startup should be performed in a controlled manner:
- Start the fan motor momentarily to check rotation
- Run the system briefly with no connected ductwork
- Check for unusual vibration or noise
- Verify amperage readings are within specifications
- Test the pulse cleaning system operation
After initial verification, proceed to full system commissioning:
- Measure airflow at each collection point
- Balance the system using dampers or blast gates
- Measure static pressure at key points in the system
- Test all safety devices and interlocks
- Verify proper operation of the pulse cleaning sequence
Performance testing should document:
- Overall system airflow
- Static pressure across filters
- Emission measurements at exhaust
- Sound levels during operation
- Vibration readings at key components
I’ve found that using a detailed commissioning checklist for cartridge dust collector systems helps ensure nothing is overlooked. The commissioning process should also include training for operators and maintenance personnel.
Dr. James Wilson, an industrial ventilation specialist I consulted with recently, emphasized that “proper commissioning isn’t just about verifying operation—it’s about establishing performance baselines that will guide future maintenance decisions.” His approach includes capturing thermal images of electrical components during operation and detailed vibration analysis—steps that have helped identify potential issues before they become problems.
Maintenance Considerations and Best Practices
While this article focuses on installation, I’d be remiss not to address maintenance planning, which should begin during the installation process. At a recent metal fabrication shop installation, we built in additional access platforms and lighting based on maintenance requirements, making filter changes and inspections significantly easier.
Develop a maintenance schedule that includes:
- Daily visual inspections
- Weekly checks of differential pressure
- Monthly inspection of pulse cleaning system
- Quarterly inspection of drive components
- Semi-annual inspection of filter condition
- Annual comprehensive system evaluation
For filter maintenance, establish clear protocols:
- Document filter change criteria (differential pressure, time-based, or visual inspection)
- Establish safe procedures for filter removal and installation
- Implement proper disposal methods for used filters
- Maintain records of filter performance and lifespan
The compressed air system requires regular attention:
- Daily draining of moisture separators
- Weekly inspection of pressure gauges
- Monthly check of solenoid valve function
- Quarterly inspection of diaphragm valves
- Annual testing of compressed air quality
Consider implementing a computerized maintenance management system (CMMS) to track maintenance activities and identify trends. I’ve seen facilities achieve significant improvements in system reliability and reductions in operating costs through structured maintenance programs.
Education is crucial—ensure that operators and maintenance personnel understand both how the cartridge dust collector operates and why specific maintenance tasks are important. This understanding leads to better decision-making and more proactive identification of potential issues.
Troubleshooting Common Installation Issues
Despite careful planning, installation challenges inevitably arise. Drawing from my experience with dozens of installations, here are common issues and their solutions:
Insufficient Airflow
When a system fails to provide adequate suction at collection points, investigate:
- Improperly sized ductwork
- Leaks in the ductwork or housing
- Incorrectly set dampers or blast gates
- Fan running in reverse
- Plugged filters due to improper pre-coating or conditioning
At a recent installation, we traced insufficient airflow to a simple but overlooked issue: the fan rotation was reversed due to incorrect phase wiring. The solution took minutes, but finding the cause required systematic troubleshooting.
Excessive Differential Pressure
High pressure drop across filters can result from:
- Improper installation of filters
- Compressed air issues affecting pulse cleaning
- Incorrect pulse timing or duration
- Dust characteristics different than design specifications
- Missing pre-separator for high dust loading
Pulse System Problems
Issues with the cleaning system often manifest as:
- Uneven cleaning patterns
- Short filter life
- Inconsistent pressure readings
- Audible leaks or unusual sounds during pulsing
- Excessive compressed air consumption
Troubleshooting table for pulse cleaning issues:
| Symptom | Possible Causes | Verification Method | Solution |
|---|---|---|---|
| No pulse | No power to solenoids, Failed solenoid, No compressed air | Check voltage at solenoid, Listen for clicking, Check pressure gauge | Restore power, Replace solenoid, Restore air supply |
| Weak pulse | Low air pressure, Restricted air line, Worn diaphragm valve | Check pressure at collector, Inspect air lines, Inspect valve | Adjust pressure, Clear restriction, Replace valve |
| Constant air leak | Damaged diaphragm, Stuck solenoid | Listen for leaks with system off, Check solenoid operation | Replace diaphragm, Clean or replace solenoid |
| Uneven cleaning | Misaligned venturi, Plugged pulse pipe | Visual inspection, Pulse test with doors open | Realign venturi, Clear obstruction |
Housing and Structural Issues
Watch for these installation-related structural problems:
- Misalignment between housing sections
- Vibration during operation
- Water or dust leaks at seams
- Difficult operation of access doors
- Unusual stress on support structures
The key to effective troubleshooting is a systematic approach. Document baseline performance during commissioning, then use that data to identify deviations. This evidence-based approach eliminates guesswork and leads to faster resolution of issues.
Effective Operation Through Proper Installation
The seven critical steps we’ve explored represent a comprehensive approach to cartridge dust collector installation. While the process requires attention to detail and technical expertise, the benefits of proper installation are substantial: improved air quality, reduced maintenance costs, extended equipment life, and consistent regulatory compliance.
During a recent conversation with environmental compliance specialist Maria Rodriguez, she observed that “the most expensive dust collector is the one that doesn’t perform as intended.” Her point resonates with my experience—proper installation is an investment that pays dividends throughout the system’s operational life.
Remember that successful installation doesn’t end with commissioning. Ongoing monitoring, regular maintenance, and operator training are essential to realizing the full potential of your dust collection system. View installation as the foundation of a comprehensive air quality management strategy.
Whether you’re managing your first dust collector installation or your fiftieth, approaching the process with methodical planning and execution will help ensure your system delivers the performance you expect and the clean air your facility requires. After all, the true measure of installation success isn’t just that the system runs—it’s that it continues to run effectively for years to come.
Frequently Asked Questions of cartridge dust collector installation
Q: What is the typical process for installing a cartridge dust collector?
A: Installing a cartridge dust collector typically involves assembling the unit’s components such as support legs, hoppers, and valves. Cartridge filters are usually pre-installed in the collector. Ensure you follow the manufacturer’s instructions to connect and secure all parts correctly.
Q: Why is it important to choose the right filter media during cartridge dust collector installation?
A: Selecting the correct filter media is crucial for optimal performance and efficiency. Different types of dust require specific filter materials to prevent premature loading. For example, PTFE-coated filters are best for oily dust.
Q: How often should cartridge filters be changed during operation?
A: Filter replacement frequency depends on usage and dust load. Generally, filters are changed when pressure across them reaches a certain threshold, usually between 6-10 inches of water column or 1.5-2.5 kilopascals. Regular maintenance ensures longevity.
Q: Are cartridge dust collectors easier to install compared to bag-style dust collectors?
A: Yes, cartridge dust collectors are often easier to install because they require less space and no internal access is needed to change filters, reducing installation and maintenance time.
Q: What safety precautions should be considered during cartridge dust collector installation?
A: Safety precautions include ensuring the system has a fire/smoke detector and possibly an NFPA-compliant deflagration system if handling combustible dust. Additionally, use appropriate safety gear during installation and ensure proper electrical connections.
Q: Can cartridge dust collectors be easily customized for different industrial applications?
A: Yes, cartridge dust collectors are versatile and can be customized to fit various industrial needs. They come in different sizes and can handle a wide range of dust types, making them suitable for diverse applications.
External Resources
- YouTube Video: Cartridge Dust Collector Assembly – A step-by-step video guide on assembling a US Air Filtration cartridge dust collector, including the hopper, enclosure, and fan.
- ACT Cartridge Dust Collector Owner’s Manual – Provides comprehensive instructions for the installation, operation, and maintenance of an ACT cartridge dust collector system.
- Parker Downward Flow Cartridge Dust Collector Manual – Includes detailed installation guidelines and safety considerations for setting up a downward flow cartridge dust collector.
- US Air Filtration: Cartridge Dust Collector Assembly – Offers a step-by-step guide on assembling a cartridge dust collector, focusing on the hopper, enclosure, and fan.
- Industrial Vacuum: 20,000 CFM Cartridge Dust Collector Manual – Covers the assembly and operation of an electric skid model cartridge dust collector, emphasizing safety and proper setup.
- Donaldson Torit: Cartridge Dust Collector Resources – Provides information on cartridge dust collector systems, including installation considerations and product options.
